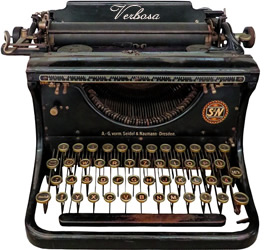
The Brother P-Touch label maker offers a versatile range of models‚ from portable handheld devices to desktop units‚ designed for efficient label creation in various environments with customizable options for personal and professional use.
1.1 Overview of the P-Touch Label Maker Series
The Brother P-Touch label maker series offers a diverse range of models designed for various labeling needs‚ from basic handheld devices like the PT-110 to advanced desktop models such as the PT-D210 and PT-P710BT. These label makers cater to both personal and professional use‚ providing features like portability‚ Bluetooth connectivity‚ and compatibility with Brother TZ/TZe tapes. The series includes models with color LCD screens‚ built-in templates‚ and wireless printing capabilities‚ making them versatile tools for organizing homes‚ offices‚ and workplaces. With a focus on ease of use and durability‚ the P-Touch series has become a popular choice for efficient labeling solutions.
1.2 Importance of Using the User Manual
The Brother P-Touch label maker user manual is essential for understanding the device’s features‚ proper usage‚ and maintenance. It provides detailed instructions for setting up‚ troubleshooting‚ and optimizing label creation. By following the manual‚ users can avoid common mistakes‚ ensure safety‚ and extend the product’s lifespan. The guide also highlights compatibility with Brother TZ/TZe tapes and offers tips for high-quality printing. Referencing the manual ensures users make the most of their label maker’s capabilities while preventing potential damage or malfunctions. It is a valuable resource for both beginners and experienced users.
Getting Started with the P-Touch Label Maker
Unboxing and setting up your P-Touch label maker involves inserting the tape cassette‚ charging‚ and familiarizing yourself with its components. Follow the manual for a smooth start.
2.1 Unboxing and Initial Setup
When unboxing your P-Touch label maker‚ ensure all accessories are included‚ such as the tape cassette‚ power adapter‚ and user manual. Begin by installing the tape cassette correctly to avoid damage. Charge the device if it’s a battery-powered model. Power on the label maker and follow the on-screen instructions for initial setup. Familiarize yourself with the control panel and navigation buttons. Refer to the manual for specific instructions tailored to your model to ensure a smooth setup process and optimal performance right from the start.
2.2 Key Components of the Label Maker
The P-Touch label maker features a clear display screen for easy label preview and editing. The keyboard allows for quick text input‚ while navigation buttons enable menu scrolling. The print button initiates label production. The tape cassette compartment holds the label tape‚ available in widths like 6mm‚ 9mm‚ and 12mm. The power button and optional connectivity ports (USB‚ Bluetooth) are essential for operation and data transfer. Additional components may include memory storage for saved labels and a cutter for trimming labels neatly. Understanding these parts ensures efficient use of the device.
2.3 Basic Safety Precautions
Always handle the P-Touch label maker with care to avoid damage or injury. Never pull the tape during operation‚ as this may damage the cassette or printer head. Avoid using the device near water or in humid environments. Keep the label maker out of reach of children. Do not operate during an electric storm‚ and unplug the adapter if lightning is present. Ensure the tape cassette is properly installed before printing to prevent damage. Use only Brother-approved tapes to maintain performance and safety. Regularly clean the device to prevent dust buildup‚ and follow all guidelines in the user manual for safe operation.

Creating Labels
The P-Touch label maker simplifies label creation with intuitive controls‚ allowing users to craft custom text‚ symbols‚ and frames efficiently. Perfect for organizing any space with professional results.
3.1 Basic Label Creation Steps
Creating labels is straightforward with the P-Touch label maker. Start by turning on the device‚ then insert a compatible Brother TZ/TZe tape cassette. Use the keyboard to type your desired text‚ and preview it on the LCD screen. Customize with built-in frames‚ fonts‚ or character sizes if needed. Once satisfied‚ press the print button to produce your label. For models like the PT-1080/1090‚ additional options like symbol selection are available. Follow these steps to efficiently craft clear‚ professional labels for any application‚ ensuring organization and readability in your space.
3.2 Advanced Label Formatting Options
The P-Touch label maker offers advanced formatting options for custom labels. Users can select from various font styles‚ sizes‚ and alignment options to enhance readability. Multi-line text and justification features allow precise control over label layout. For added functionality‚ incorporate symbols‚ frames‚ or even QR codes directly from the device. Certain models‚ like the PT-P710BT‚ support advanced features such as mirroring text or adding custom images via Brother’s P-Touch software. These tools enable users to create professional-looking labels tailored to specific needs‚ whether for organizational purposes or creative projects‚ ensuring a polished and efficient labeling experience.
3.3 Using Built-In Templates
The P-Touch label maker includes built-in templates to streamline label creation. These templates cater to common labeling needs‚ such as file folders‚ cables‚ or storage containers. Users can easily access these templates through the device’s menu and customize them by adding text‚ symbols‚ or adjusting layouts. This feature saves time and ensures consistency in label design. Models like the PT-H103W and PT-P710BT support these templates‚ allowing users to create professional-looking labels efficiently. By leveraging built-in templates‚ users can achieve polished results without starting from scratch‚ making the labeling process faster and more straightforward for various applications.
3.4 Editing and Customizing Labels
The P-Touch label maker allows users to edit and customize labels with ease. Options include changing font sizes‚ bolding or italicizing text‚ and adding symbols or logos. Users can navigate through the menu using arrow keys to adjust settings. Custom text can be entered using the QWERTY keyboard on select models. For enhanced personalization‚ some devices support importing custom images or logos via Brother’s P-Touch software. This feature ensures labels are tailored to specific needs‚ making them more professional and visually appealing. Editing capabilities enable users to refine their labels before printing‚ ensuring accuracy and clarity in their designs.

Printing Labels
Print labels by loading the tape‚ selecting options via the menu‚ and ensuring proper alignment. Use Brother TZ/TZe tapes for best results and follow guide instructions carefully.
4.1 Printing Process Overview
Printing labels with a Brother P-Touch label maker involves inserting the tape cassette‚ powering on the device‚ selecting settings‚ and pressing print. Always use Brother TZ/TZe tapes for optimal performance.
4.2 Troubleshooting Common Printing Issues
Common printing issues with the P-Touch label maker include the device not printing‚ labels not feeding‚ or poor print quality. Ensure the label maker is powered on‚ the tape cassette is correctly installed‚ and the print head is clean. If labels are not feeding‚ check for obstructions or improper tape alignment. Avoid pulling the tape‚ as this may damage the cassette. For error messages‚ refer to the user manual for solutions. Regularly cleaning the print head and using Brother TZ/TZe tapes can prevent issues. Always unplug during storms to avoid damage.
4.3 Tips for High-Quality Label Printing
For high-quality label printing‚ use genuine Brother TZ/TZe tapes‚ as they ensure vibrant colors and sharp text. Clean the print head regularly to prevent smudging and ensure proper ink adhesion. Align the tape correctly in the cassette‚ avoiding misfeeding. Use the correct label size and type for your needs‚ and adjust settings like font size and spacing for clarity. Avoid pulling the tape during printing‚ as this may cause damage. Store unused tape in a dry‚ cool place to maintain quality. Refer to the user manual for optimal settings and maintenance tips to achieve professional-looking labels consistently.

Maintenance and Care
Regularly clean the print head and ensure proper tape alignment. Use genuine Brother tapes and store them in a dry place to maintain quality and longevity.
5.1 Cleaning the Label Maker
Regular cleaning ensures optimal performance and longevity of your P-Touch label maker. Use a soft‚ dry cloth to wipe the exterior and internal components. For the print head‚ gently remove any debris or adhesive residue with a cotton swab. Avoid using harsh chemicals or abrasive materials that could damage the device. Clean the tape compartment periodically to prevent dust buildup. Ensure the label maker is turned off before cleaning; Regular maintenance helps prevent jams and ensures high-quality label printing. Refer to the user manual for specific cleaning instructions tailored to your model.
5.2 Replacing the Tape Cassette
To replace the tape cassette‚ first‚ turn off the label maker. Open the tape compartment by lifting the top cover or pressing the release button. Remove the empty cassette carefully. Insert the new Brother TZ or TZe tape cassette‚ aligning it with the guides. Close the compartment firmly. Ensure the tape feeds correctly and test by printing a small label. Proper installation prevents jams and ensures high-quality output. Always use genuine Brother tapes to maintain optimal performance and longevity of your P-Touch label maker.
5.3 Regular Maintenance Tips
Regular maintenance ensures optimal performance of your P-Touch label maker. Clean the device periodically by gently wiping dust from the print head and tape compartment with a soft cloth. Check for and remove any residual tape fragments. Store the label maker in a dry‚ cool place to avoid moisture damage. Use only Brother-approved tapes and accessories to prevent jams and wear. Regularly inspect the cutter for sharpness and replace it if necessary. Establish a maintenance routine every 1-2 months to ensure longevity and smooth operation of your P-Touch label maker.

Common Issues and Solutions
Address common issues like jammed tapes‚ error messages‚ or print head damage by referring to the troubleshooting guide in the user manual for quick‚ effective solutions.
6.1 Error Messages and Their Meanings
Understand common error messages on your P-Touch label maker‚ such as “Paper Jam” or “Tape End‚” by referring to the user manual. These alerts indicate issues like misaligned tapes or empty cassettes. Solve problems by turning the device off‚ checking the tape‚ or cleaning internal components. Some errors may require resetting the label maker or updating firmware. Always consult the manual for specific solutions to ensure proper functioning and prevent damage. Regular maintenance can help minimize errors and extend the lifespan of your P-Touch device.
6.2 Resolving Hardware Malfunctions
If your P-Touch label maker experiences hardware issues‚ such as a jammed tape or faulty print head‚ start by turning it off and consulting the user manual. For tape jams‚ gently remove the cassette and clear any obstructions. If the print head is damaged‚ avoid further use and contact Brother support. Regular cleaning of the print head and internal components can prevent malfunctions. Ensure the tape cassette is properly aligned and seated. Avoid using force‚ as it may damage internal mechanisms. Refer to the manual for troubleshooting guides or maintenance tips to restore functionality and extend the device’s lifespan.

Safety Guidelines
Always unplug the P-Touch label maker during electric storms and avoid pulling the tape to prevent damage. Keep the device out of reach of children and pets.
7.1 Proper Handling of the Label Maker
Handle the P-Touch label maker with care to ensure longevity and safety. Avoid dropping or exposing it to extreme temperatures. Keep it away from children and pets to prevent accidental damage. Use only Brother-recommended tapes to maintain optimal performance. Never pull the tape forcefully‚ as this may damage the cassette or print head. Regularly clean the device to remove dust and debris. Store the label maker in a dry‚ cool place when not in use. Follow the user manual’s guidelines for proper operation and maintenance to ensure reliable functionality and extend the product’s lifespan.
7.2 Avoiding Damage to the Device
Prevent damage by avoiding improper use of the P-Touch label maker. Never insert sharp objects or foreign materials into the device‚ as this can harm internal components. Avoid exposing the label maker to moisture or direct sunlight‚ which may cause electrical or mechanical issues. Do not use tapes without the Brother TZ/TZe certification‚ as they may not be compatible and could damage the print head. Unplug the device during power outages or storms to protect against voltage spikes. Regular maintenance‚ such as cleaning and replacing worn parts‚ ensures optimal performance and extends the device’s lifespan. Always follow the user manual’s guidelines for safe operation.
Compatible Label Tapes
Use genuine Brother TZ/TZe tapes for optimal performance. Available in widths of 6mm‚ 9mm‚ and 12mm‚ these tapes ensure high-quality printing and durability. Avoid non-certified tapes to prevent damage.
8.1 Recommended Tape Sizes
Brother P-Touch label makers support a variety of tape sizes‚ including 6mm‚ 9mm‚ and 12mm widths. These sizes are versatile for different labeling needs‚ from small organizers to large industrial labels. The 6mm tape is ideal for fine details‚ while 9mm and 12mm tapes are better for bold text and general use. Always ensure the tape width matches your label maker’s specifications for proper functionality. Using the correct size enhances print quality and prevents potential damage to the device. Choose the right size based on your specific labeling requirements for optimal results.
8.2 Using Brother TZ/TZe Tapes
Brother TZ/TZe tapes are specifically designed for P-Touch label makers‚ offering high-quality‚ durable labels. They are available in various widths‚ including 6mm‚ 9mm‚ and 12mm‚ to suit different labeling needs. These tapes are water-resistant and offer crisp‚ clear text for professional results. For optimal performance‚ ensure the tape width matches your label maker’s specifications; Avoid using non-recommended tapes‚ as they may damage the device. Brother TZ/TZe tapes are ideal for both indoor and outdoor use‚ providing long-lasting labels in various environments. Always choose genuine Brother tapes for consistent quality and reliability.
Software and Connectivity
Built-in Brother P-Touch software enhances label creation‚ offering advanced features for customization. Connect seamlessly via USB‚ Bluetooth‚ or wireless‚ ensuring easy integration with computers and mobile devices for efficient labeling.
9.1 Connecting to a Computer
Connecting your P-Touch label maker to a computer allows for advanced label design and printing. Use a USB cable to establish a wired connection‚ ensuring compatibility with your device. Alternatively‚ select models offer Bluetooth or wireless connectivity for a seamless link to your PC or mobile device. Once connected‚ install the Brother P-Touch software to access a wide range of templates and design tools. This setup enables efficient label creation‚ ideal for both personal and professional environments‚ enhancing your labeling experience with customization options and ease of use. Follow the user manual for detailed step-by-step instructions to ensure a smooth setup process. Always use genuine Brother software to maintain optimal functionality and performance. Regularly update your software to access the latest features and improvements. Ensure your label maker is properly synced with your computer for a reliable connection and high-quality label printing. This feature is particularly beneficial for businesses requiring consistent and professional labeling solutions. By connecting to a computer‚ you can unlock the full potential of your P-Touch label maker‚ making it an indispensable tool for organization and productivity. Always refer to the user manual for troubleshooting any connectivity issues and to ensure your device is operating at its best. With a stable connection‚ you can easily manage and print labels‚ streamlining your workflow and enhancing efficiency. This connectivity option is a key feature that sets Brother P-Touch label makers apart from basic handheld devices‚ offering a more comprehensive labeling solution. Whether for home‚ office‚ or industrial use‚ connecting your P-Touch label maker to a computer provides the flexibility and functionality needed to meet all your labeling needs. Make the most of this feature by exploring the various design options and templates available through the Brother P-Touch software. This will allow you to create professional-looking labels that are both durable and visually appealing‚ ensuring that your labels stand out and serve their purpose effectively. By taking advantage of the computer connectivity feature‚ you can experience the full capabilities of your P-Touch label maker‚ making it an essential tool for any setting that requires high-quality labels. Always remember to follow the guidelines provided in the user manual to ensure a successful and trouble-free connection. This will help you avoid common issues and make the most of your labeling experience. With a proper connection‚ you can enjoy the convenience and efficiency that comes with using a Brother P-Touch label maker‚ making it an excellent choice for all your labeling needs.
9.2 Using Brother P-Touch Software
The Brother P-Touch software enhances label creation with a user-friendly interface. It offers customizable templates‚ advanced formatting options‚ and compatibility with various P-Touch models. Users can design labels with text‚ symbols‚ and images‚ ensuring professional results. The software allows for seamless integration with your label maker‚ enabling efficient printing. Regular updates provide access to new features and improvements. For optimal performance‚ always use the latest version of the software. The P-Touch software is ideal for both personal and professional use‚ making it easy to create high-quality labels tailored to your needs. Explore its features to maximize your labeling experience and efficiency.
9.4 Bluetooth and Wireless Connectivity
Brother P-Touch label makers with Bluetooth and wireless connectivity offer seamless integration with mobile devices. Models like the P-Touch Cube PT-P710BT enable label creation via Android or iOS apps‚ allowing users to design and print labels wirelessly. This feature is ideal for on-the-go use‚ eliminating the need for cables. The ability to create QR codes linking to URLs adds versatility. Wireless connectivity enhances convenience‚ making it easier to print labels from smartphones or tablets. This feature is particularly useful for organizing spaces efficiently and streamlining labeling tasks in both personal and professional settings.
Downloading the User Manual
Access the Brother Solutions Center‚ click on Manuals‚ and select your model to download the user manual for your P-Touch label maker.
10.1 Steps to Download the Manual
To download the user manual for your P-Touch label maker‚ visit the Brother Solutions Center. Click on the Manuals section and select your specific model. Follow the on-screen instructions to download the PDF file. Ensure you have the correct model number for accurate results. Once downloaded‚ you can access guides for setup‚ troubleshooting‚ and advanced features. This resource is essential for maximizing your label maker’s functionality and resolving any operational issues promptly.
10.2 Navigating the Brother Solutions Center
Navigating the Brother Solutions Center is straightforward. Start by visiting the official Brother website and selecting your region. Click on Support and choose Manuals from the dropdown menu. Enter your P-Touch model number or select it from the product list. Browse through available resources‚ including user manuals and guides. Use the search bar for quick access to specific documents. Ensure you select the correct language and format (e.g.‚ PDF) for your manual. This centralized hub provides easy access to all necessary documentation‚ ensuring you can troubleshoot and operate your label maker efficiently.
Tips and Tricks
Organize labels efficiently using built-in templates and customize designs for specific tasks. Utilize QR code generation for advanced functionality and streamline workflows with Bluetooth connectivity options for wireless printing convenience.
11.1 Efficient Label Organization
Efficiently organize labels by categorizing them based on purpose‚ such as files‚ cables‚ or storage. Use the P-Touch label maker’s built-in templates to create consistent and professional-looking labels. Implement a color-coding system with Brother’s TZ/TZe tapes to visually distinguish different categories. Regularly review and update labels to maintain clarity and relevance. Store unused labels in a designated area to prevent loss or damage. Consider using adjustable font sizes and bold text for enhanced readability. Finally‚ ensure labels are applied smoothly and securely to avoid peeling or fading over time.
11.2 Using QR Codes and Advanced Features
The P-Touch label maker allows you to create QR codes directly from the device or its accompanying software. This feature is ideal for embedding URLs‚ contact information‚ or instructions into labels. Models like the PT-P710BT support Bluetooth connectivity‚ enabling seamless integration with smartphones and tablets. Use the P-Touch Editor software to design complex labels with barcodes‚ symbols‚ and custom fonts. Advanced features also include multi-line text‚ auto-formatting‚ and label preview options. For enhanced functionality‚ explore the Brother Solutions Center for updates and additional templates to maximize your labeling efficiency and creativity.

Accessories and Replacement Parts
The P-Touch label maker supports various accessories‚ including Brother TZ/TZe tapes (available in 6mm‚ 9mm‚ and 12mm widths)‚ batteries‚ adapters‚ and carrying cases. Always use genuine Brother parts for optimal performance and compatibility.
12.1 Available Accessories
B Brother P-Touch label makers offer a variety of accessories to enhance functionality. Genuine Brother TZ/TZe tapes are available in multiple widths (6mm‚ 9mm‚ 12mm) and colors‚ ensuring durability and clarity. Additional accessories include rechargeable batteries‚ AC adapters‚ and carrying cases for portability. These items are designed to maintain optimal performance and extend the life of your label maker. Purchasing genuine Brother parts ensures compatibility and quality‚ preventing potential damage from non-approved products. Explore the full range of accessories to customize your labeling experience and keep your device operating smoothly.
12.2 Purchasing Genuine Brother Parts
When purchasing accessories for your P-Touch label maker‚ ensure authenticity by buying genuine Brother parts. These products are designed to meet Brother’s quality standards‚ guaranteeing optimal performance and compatibility. Genuine Brother tapes‚ such as the TZ/TZe series‚ are recommended for their durability and clear printing results. Visit the Brother Solutions Center or authorized retailers to purchase genuine parts. Avoid non-approved products‚ as they may damage your device or void the warranty. Always verify the product’s authenticity to ensure reliability and maintain the longevity of your label maker.